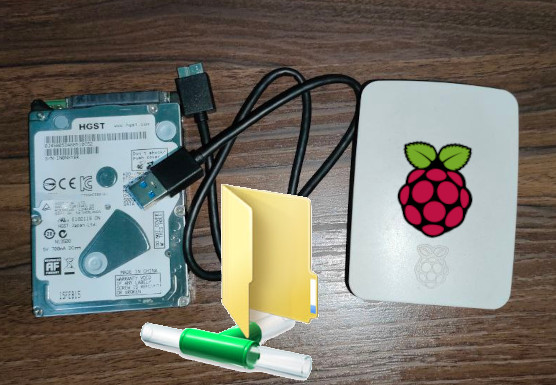
I had a spare 2.5″ spinning hard drive lying around with USB to SATA adapter. I wanted to share this drive and its content over the home network and the most recommended and obvious solution was to set up a dedicated NAS server. While setting up a NAS server over your Raspberry Pi (or any other SBC) sounds cool, it typically requires flashing a completely specialized distribution on Raspberry Pi. While that may work for a lot of people, I felt my Pi would be underutilized, I also wanted to run other services on my RPi and SSH/VNC into it while still being able to share my external USB drive over network.
Enter Samba server – Samba enables you to share local printer and files over network using SMB/CIFS protocol – that basically means you can access any partition or directory from your Raspberry Pi over your Linux, Windows, Mac OS and iOS devices – which is basically what you want in this case.
In this post I will cover how to permanently mount external disk partition on your Raspberry Pi so that they are auto-mounted when you boot up your Pi, I will also cover how to setup Samba server and how to actually make it work with Windows 10/11 (it doesn’t out of box).
Automount external drive
This step is needed so that whenever you reboot your Pi, the partitions from the external USB drive are automatically mounted. You don’t need to do this if you are sharing a local folder from your Raspberry Pi/SBC device.
I am going to assume your externally connected drive has two partitions.
Step 1: Create mount points. We will create two mount points for the two partitions – /mnt/hdd01/vol1 and /mnt/hdd01/vol2 for the purpose of this article I am putting the two partitions under “hdd01” folder, but you may not do this and can create the mount points directly under /mnt
To create all the two mount points using a single command, enter the following on your Raspberry Pi terminal
sudo mkdir /mnt/hdd01/{vol1,vol2} -p
Verify that the mount points are actually created
$ ls -l /mnt/hdd01

total 12
drwxr-xr-x 2 root root 4096 Nov  7 16:13 vol1
drwxr-xr-x 2 root root 4096 Nov  7 16:13 vol2
Step 2: Set required permissions for the mount point. To keep things simple, I will be giving 777 permission so that everybody can access and write to these partitions.
Run this command to recursively set permission 777 for both the folders under “hdd01” and “hdd01” itself.
$ sudo chmod -R 777 /mnt/hdd01/

$ ls -l /mnt/hdd01
total 12
drwxrwxrwx 2 root root 4096 Nov  7 16:13 vol1
drwxrwxrwx 2 root root 4096 Nov  7 16:13 vol2
Step 3: Connect the external USB drive. Before moving to the next step, it is necessary that you have already connected the drive that you want to share over network.
Step 4: Figure out UUID and file system type of the partitions. Raspberry Pi must know unique identifiers of your partitions to be able to mount them whenever it sees them.
To figure out UUID of your partitions, use the lsblk utility,
$ lsblk -f
NAME        FSTYPE LABEL  UUID                                 FSAVAIL FSUSE% MOUNTPOINT
sda
├─sda1      ext4          0753CEEE1F6615FB
└─sda2      ntfs          2F33A9AD22CC0324
mmcblk0
├─mmcblk0p1 vfat   boot   8D64-2011                               204M    19% /boot
└─mmcblk0p2 ext4   rootfs 3857a514-b0f4-49ce-8430-34762068bb6f      2G    67% /
sda1 and sda2 in the above output are the partitions from the external USB drive, and we can see the UUID and FSTYPE columns in the output for UUID and file system type respectively, note these down because you will need them in the next step.
Step 5: Create fstab entry for the partitions. This is where the magic happens.
Edit /etc/fstab file and add the following lines towards the end of the file, be careful about the white space.
# Partitions from HDD
UUID=0753CEEE1F6615FB    /mnt/hdd01/vol1         ext4    defaults        0       0
UUID=2F33A9AD22CC0324    /mnt/hdd01/vol2         ntfs    defaults        0       0
Make sure you replace my UUID with the UUIDs in the output from Step 4.
Here is the explanation of what these fstab entries do,
The first column contains identity of the device/partition. In our case we chose to use UUID because it more reliable. We could also have used directly the device path, like /dev/sda1 however that path may change in case you connect a different device and it is detected first, causing the wrong partition to get mounted.
The second column contains mount location. This is the folders we created for the two partitions in Step 1.
The third field is file system type, in our case, as per the output of lsblk we identifier these partitions to be ext4 and ntfs respectively.
The fourth field contains value “defaults” – it implies several flags under the hood – rw, suid, dev, exec, auto, nouser, and async.
The fifth column indicates whether we want the partition to be backed up by the dump utility. Since we are not interest in that, it is 0.
The sixth column indicates how we want the file system to be checked by fsck utility. This is again something we are not interested in, therefore the value is 0
That’s all, with these lines in /ets/fstab – when you reboot your Raspberry Pi device, you would see the contents of these partitions are automatically made available inside /mnt/hdd01
Setup Samba Server
Samba Server is key to actually make the drives and directory discoverable and accessible via network on various different types of devices. Using the SMB/CIFS protocol, you could access your partitions and directories over network without actually having to care about the underlying file system – allowing you ability to access your network share from Raspberry Pi via virtually any kind of device.
Step 1: Install Samba utility
sudo apt-get install samba samba-common-bin
Step 2: Create Samba Share. We want to configure Samba to create a share for each of the two mount points that we had created. To do this, you need to add the following towards the end of the /etc/samba/smb.cnf file
########## CUSTOM DRIVE SHARING ###########
[vol1]
path = /mnt/hdd01/vol1
writeable=Yes
public=yes

[vol2]
path = /mnt/hdd01/vol2
writeable=Yes
public=yes
With these block of lines we are telling Samba that we want to share the /mnt/hdd01/vol1 and /mnt/hdd01/vol2 folders over network with the names “vol1” and “vol2” – as indicated in the square brackets. We also want these folders to be accessible without any username or password and everybody on the network should be able to write and modify content of these directories.
Step 3: With having configured Samba, enable the smbd service and start it. This will ensure it is always up whenever you boot into your Raspberry Pi device.
$ sudo systemctl enable smbd.service
Synchronizing state of smbd.service with SysV service script with /lib/systemd/systemd-sysv-install.
Executing: /lib/systemd/systemd-sysv-install enable smbd

$ sudo systemctl start smbd.service
To confirm if the Samba share is working, restart your Raspberry Pi device and once it is up, run smbclient -L \\192.168.1.101 – relace the IP address with the actual IP of your RPi device. When prompted for password, just press enter. After that you should see the list containing “vol1” and “vol2”
$ smbclient -L \\192.168.1.101
Password for [SAMBA\avinesh]:

        Sharename       Type      Comment
        ---------       ----      -------
        vol1            Disk
        vol2            Disk
We are not done yet
Ideally these steps should have been sufficient but they are not. You may notice that while you are able to access SMB share on Linux, it may not work on your Windows 10/11, or Mac OS devices. You will see that if you goto “Networks” location in Windows Explorer, your Raspberry Pi device would not appear in the list. This is because newer builds of Windows do not support SMBv1 and NetBios out of box – it uses a different protocol to “discover” serviceso on network “WS-Discovery” which is not supported by Samba out of the box.
To make Samba share work with Windows and other devices, you need to do two things,
1. Restrict the SMB version
2. Enable WS Discovery
These are discussed in the following two sections
Make Samba work with SMB2/SMB3 for newer Windows builds
Head back to /etc/samba/smb.cnf file that we edited earlier. You need to add the following lines immediately under [global] section such that your file should look like this (note, the three spaces before the line are intentional),
[global]

# These are required to make it work with Windows 10
   encrypt passwords = true
   min protocol = SMB2
   max protocol = SMB3

### REST of the Stuff below ###
Restart the smbd.service and ensure that Samba shares are still working fine on Linux side of the things.
Enable WS Discovery for SMB to work with Windows
Web Service Discovery (WS Discovery) isn’t available in Samba. Someone one internet called Steffen Christgau went through the effort of creating a Python3 utility that implements WS Dicovery specification called wsdd.
The wsdd utility is not available on all the distros yet, however you can install it yourself. The most easiest way is to add Steffen’s source in sources.list and install wsdd via apt. To do these follow the given steps,
Step 1: Create wsdd.list file via the command sudo nano /etc/apt/sources.list.d/wsdd.list and add the following in the file content,
# In case you are using a different version of Raspberry Pi OS, replace "buster" with whatever is the current
deb https://pkg.ltec.ch/public/ buster main
Step 2: Import the GPG keys via the command sudo apt-key adv –fetch-keys https://pkg.ltec.ch/public/conf/ltec-ag.gpg.key
Step 3: Update the apt cache and install the wsdd utility,
$ sudo apt-get update

$ sudo apt-get install wsdd
Step 4: The wsdd tool comes with a service that you need to enable and start, like in case of smbd.service – this is required so that this service is always up and running whenever you boot int your Pi,
$ sudo systemctl enable wsdd.service

$ sudo systemctl start wsdd.service
And that’s it
Conclusion
With these steps you should now be able to access your external USB disk drive connected to Raspberry Pi over network through Samba. Not only that but we also performed some extra steps to make sure this network file sharing works with latest version of Windows, Mac OS and iOS/iPadOS devices. As a next step you might want to read about file mounting and how to secure some of the shared folders and partitions over Samba.
Step1: creating wsdd.list Replacing buster with bullseye will cause Step 2 to fail.
Step2 import of the GPG keys does not work under Bullseye because apt-key has been deprecated. Looks like wsdd cannot be installed this way.
I found the following useful
https://github.com/bupar01/raspberrypi-wsdd-install